Hey there! I'm a supplier of rubber molded parts, and I know firsthand how frustrating it can be to deal with flash on these parts. Flash is that thin, unwanted excess rubber that forms around the edges of a molded part during the manufacturing process. It can not only affect the appearance of the part but also its functionality. In this blog, I'm gonna share some tips on how to control the flash of rubber molded parts.
Understanding the Causes of Flash
Before we dive into the solutions, it's important to understand what causes flash in the first place. There are several factors that can contribute to the formation of flash, including:
- Mold Design: A poorly designed mold can lead to uneven pressure distribution during the molding process, which can cause rubber to escape from the mold cavity and form flash.
- Mold Wear: Over time, molds can wear down, which can create gaps between the mold halves. These gaps allow rubber to seep out and form flash.
- Incorrect Molding Parameters: If the molding temperature, pressure, or time is not set correctly, it can cause the rubber to flow unevenly and form flash.
- Rubber Compound: The type of rubber compound used can also affect the formation of flash. Some compounds are more prone to flash than others.
Tips for Controlling Flash
Now that we know what causes flash, let's take a look at some tips for controlling it.
1. Optimize Mold Design
One of the most effective ways to control flash is to optimize the mold design. Here are some things to consider:
- Proper Venting: Make sure the mold has adequate venting to allow air and excess rubber to escape during the molding process. This can help prevent flash from forming.
- Precise Tolerances: Ensure that the mold is designed with precise tolerances to minimize the gaps between the mold halves. This can reduce the amount of rubber that escapes and forms flash.
- Gating Design: The gating system plays a crucial role in controlling the flow of rubber into the mold cavity. A well-designed gating system can help ensure that the rubber flows evenly and reduces the likelihood of flash.
2. Maintain Molds Regularly
Regular maintenance of molds is essential to prevent flash. Here are some maintenance tasks to perform:
- Cleaning: Clean the molds regularly to remove any dirt, debris, or residual rubber. This can help prevent the buildup of material that can cause flash.
- Inspection: Inspect the molds for wear and damage on a regular basis. Replace any worn or damaged parts to ensure that the mold is functioning properly.
- Lubrication: Apply a suitable lubricant to the mold surfaces to reduce friction and prevent the rubber from sticking to the mold. This can help reduce the formation of flash.
3. Adjust Molding Parameters
The molding parameters, such as temperature, pressure, and time, can have a significant impact on the formation of flash. Here are some adjustments you can make:
- Temperature: Adjust the molding temperature to ensure that the rubber is at the optimal viscosity for molding. If the temperature is too high, the rubber may flow too easily and form flash. If the temperature is too low, the rubber may not flow properly and result in incomplete filling of the mold cavity.
- Pressure: Increase the molding pressure to ensure that the rubber is forced into all areas of the mold cavity. However, be careful not to apply too much pressure, as this can cause the rubber to escape from the mold and form flash.
- Time: Adjust the molding time to ensure that the rubber has enough time to cure properly. If the molding time is too short, the rubber may not be fully cured, which can lead to flash. If the molding time is too long, the rubber may overcure and become brittle.
4. Select the Right Rubber Compound
The type of rubber compound used can also affect the formation of flash. Here are some things to consider when selecting a rubber compound:
- Viscosity: Choose a rubber compound with the appropriate viscosity for the molding process. A compound with too low a viscosity may flow too easily and form flash, while a compound with too high a viscosity may not flow properly and result in incomplete filling of the mold cavity.
- Curing Properties: Select a rubber compound with the right curing properties for the molding process. A compound that cures too quickly may not have enough time to flow evenly, while a compound that cures too slowly may result in overcuring and flash.
- Additives: Some rubber compounds contain additives that can help reduce the formation of flash. For example, additives such as lubricants and release agents can help the rubber flow more easily and prevent it from sticking to the mold.
5. Use Post-Molding Operations
In some cases, post-molding operations may be necessary to remove flash. Here are some common post-molding operations:
- Trimming: Trimming is the most common method of removing flash. It involves using a sharp blade or tool to cut off the excess rubber.
- Buffing: Buffing is a process of using a rotating abrasive wheel to remove flash. This method is often used for parts with complex shapes or hard-to-reach areas.
- Deflashing Machines: Deflashing machines are automated devices that use various methods, such as tumbling, blasting, or freezing, to remove flash. These machines can be very effective for high-volume production.
Real-World Examples
To give you a better idea of how these tips can be applied in real-world situations, let's take a look at some examples.
Example 1: Abru Step Ladder Rubber Feet
Abru Step Ladder Rubber Feet are designed to provide a non-slip surface and protect the ladder from damage. To control flash on these parts, we optimized the mold design by ensuring proper venting and precise tolerances. We also maintained the molds regularly to prevent wear and damage. By using a high-quality rubber compound with the right viscosity and curing properties, we were able to reduce the formation of flash and produce high-quality rubber feet.
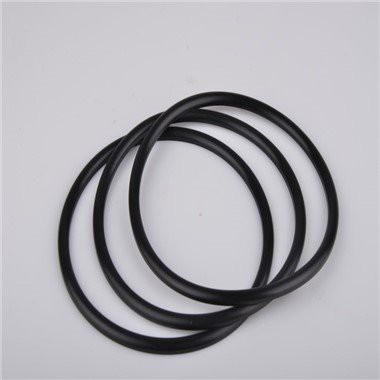
Example 2: OEM Black Round Rubber Gasket
OEM Black Round Rubber Gasket are used in a variety of applications, such as automotive engines and plumbing systems. To control flash on these gaskets, we adjusted the molding parameters, such as temperature and pressure, to ensure that the rubber flowed evenly into the mold cavity. We also used a post-molding trimming operation to remove any excess rubber. By following these steps, we were able to produce gaskets with minimal flash and excellent sealing performance.


Example 3: Rubber Latch
Rubber Latch are used to secure doors, hatches, and other components. To control flash on these latches, we selected a rubber compound with the right additives to reduce the formation of flash. We also optimized the gating design to ensure that the rubber flowed evenly into the mold cavity. By using a combination of these techniques, we were able to produce latches with a smooth finish and no visible flash.
Conclusion
Controlling flash on rubber molded parts is essential to ensure the quality and functionality of the parts. By understanding the causes of flash and implementing the tips outlined in this blog, you can reduce the formation of flash and produce high-quality rubber molded parts. If you're interested in learning more about our rubber molded parts or have any questions about flash control, please don't hesitate to contact us for a procurement discussion. We'd be happy to help you find the right solutions for your needs.
References
- "Rubber Molding Handbook" by John A. Brydson
- "Molding of Plastics and Composites" by Osswald, Turner, and Gramann
- "Rubber Technology: Compounding, Testing, and Applications" by Maurice Morton