Installing a solid rubber gasket in a heat exchanger is a crucial task that demands precision and knowledge. As a reliable solid rubber gasket supplier, I've witnessed firsthand the significance of proper installation for the optimal performance of heat exchangers. In this blog, I'll guide you through the step - by - step process of installing a solid rubber gasket in a heat exchanger, sharing insights and tips along the way.
Understanding the Basics of Solid Rubber Gaskets
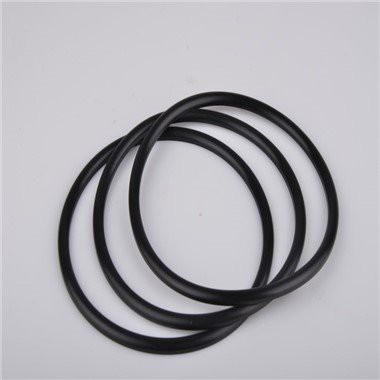
Before diving into the installation process, it's essential to understand what solid rubber gaskets are and why they are used in heat exchangers. Solid rubber gaskets are made from various types of rubber compounds, each with unique properties such as resistance to heat, chemicals, and pressure. These gaskets play a vital role in preventing leaks and ensuring the efficient transfer of heat within the exchanger.
There are different types of solid rubber gaskets available, including Liquid Rubber Gasket, Soft Rubber And Gasket, and Gasket Rubber Pad. The choice of gasket depends on the specific requirements of the heat exchanger, such as the operating temperature, pressure, and the type of fluids being used.
Pre - installation Preparations
Inspect the Heat Exchanger
The first step is to thoroughly inspect the heat exchanger. Check for any signs of damage, corrosion, or debris on the mating surfaces where the gasket will be installed. Clean the surfaces using a suitable solvent to remove dirt, oil, and other contaminants. A clean surface is essential for a proper seal and to prevent premature gasket failure.
Select the Right Gasket
Choose a solid rubber gasket that is compatible with the heat exchanger's operating conditions. Consider factors such as temperature range, chemical resistance, and pressure ratings. Refer to the manufacturer's specifications or consult with our technical experts if you're unsure which gasket is the best fit for your application.
Gather the Necessary Tools
You'll need a few tools for the installation process, including a torque wrench, a scraper to clean the surfaces, a gasket adhesive (if required), and a soft brush to apply the adhesive. Make sure all the tools are in good working condition and calibrated correctly, especially the torque wrench, to ensure accurate tightening.
Installation Steps
Step 1: Apply Gasket Adhesive (if required)
Some solid rubber gaskets may require the use of a gasket adhesive to ensure proper seating and prevent movement. If using an adhesive, apply a thin, even layer to both the gasket and the mating surfaces of the heat exchanger. Follow the manufacturer's instructions regarding the type of adhesive to use and the application method.
Step 2: Position the Gasket
Carefully place the solid rubber gasket on the mating surface of the heat exchanger. Make sure it is centered and aligned correctly. The gasket should fit snugly into the grooves or recesses provided for it. Avoid stretching or distorting the gasket during this process, as it can affect its sealing performance.
Step 3: Assemble the Heat Exchanger
Once the gasket is in place, assemble the heat exchanger components. Align the bolts or fasteners with the holes and insert them carefully. Do not fully tighten the bolts at this stage; just finger - tighten them to hold the components together.
Step 4: Tighten the Bolts
Using a torque wrench, tighten the bolts in a criss - cross pattern to ensure even pressure distribution across the gasket. Follow the recommended torque values provided by the heat exchanger manufacturer. Over - tightening the bolts can damage the gasket and the heat exchanger components, while under - tightening can lead to leaks.
Step 5: Re - check the Installation
After tightening the bolts, re - check the installation to ensure that the gasket is still in place and properly aligned. Look for any signs of misalignment or damage to the gasket. If necessary, make any adjustments and re - tighten the bolts if they have loosened during the process.
Post - installation Checks
Pressure Test
Conduct a pressure test on the heat exchanger to check for leaks. Slowly increase the pressure to the operating level and monitor the system for any signs of leakage. If a leak is detected, immediately shut down the system and identify the source of the leak. It could be due to improper gasket installation, damage to the gasket, or a problem with the heat exchanger components.


Visual Inspection
Perform a visual inspection of the gasket and the heat exchanger after the pressure test. Look for any signs of deformation, extrusion, or damage to the gasket. If any issues are found, replace the gasket and repeat the installation process.
Tips for a Successful Installation
- Handle the Gasket with Care: Solid rubber gaskets are delicate and can be easily damaged. Avoid touching the sealing surfaces with your bare hands, as the oils from your skin can affect the gasket's performance.
- Follow the Manufacturer's Instructions: Always refer to the heat exchanger and gasket manufacturer's instructions for specific installation guidelines. Different models and types of gaskets may have unique requirements.
- Keep Records: Maintain records of the gasket installation, including the date of installation, the type of gasket used, and the torque values applied. This information can be useful for future maintenance and troubleshooting.
Why Choose Our Solid Rubber Gaskets
As a solid rubber gasket supplier, we take pride in offering high - quality gaskets that meet the most demanding industry standards. Our gaskets are manufactured using advanced techniques and the finest materials, ensuring excellent performance and durability. We have a wide range of gaskets available, including Liquid Rubber Gasket, Soft Rubber And Gasket, and Gasket Rubber Pad, to suit various heat exchanger applications.
If you're looking for reliable solid rubber gaskets for your heat exchanger, we're here to help. Our team of experts can assist you in selecting the right gasket for your specific needs and provide technical support throughout the installation process. Contact us to discuss your requirements and start a procurement negotiation. We're committed to providing you with the best products and services to ensure the optimal performance of your heat exchanger.
References
- "Heat Exchanger Design Handbook", by Heat Exchanger Institute
- Manufacturer's specifications for solid rubber gaskets and heat exchangers