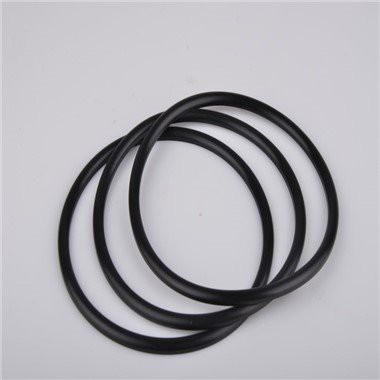

Hey there! As a supplier of rubber caps, I often get asked about how to install these nifty little items. In this blog, I'm gonna walk you through the process step by step, so you can get your rubber caps on and working in no time.
First off, let's talk about why rubber caps are so useful. Rubber caps serve a bunch of purposes. They can protect the ends of objects from damage, like scratches or corrosion. They can also provide a seal, keeping out dust, dirt, and moisture. And in some cases, they can even reduce noise and vibration. So, whether you're using them in a DIY project, for industrial applications, or just to spruce up your home, rubber caps are a great addition.
Now, there are different types of rubber caps out there, and each might have a slightly different installation process. Let's start with the Protective Rubber End Caps. These are the ones you'd typically use to cover the ends of rods, tubes, or pipes.
Installing Protective Rubber End Caps
-
Prepare the Surface: Before you start putting on the rubber caps, make sure the surface of the object you're covering is clean and dry. Any dirt, grease, or moisture can prevent the cap from fitting properly or adhering well. You can use a clean cloth to wipe down the end of the rod or tube. If there's stubborn dirt, you might need to use a mild cleaner, but make sure to rinse it off thoroughly and let it dry completely.
-
Choose the Right Size: It's crucial to pick the right size of rubber cap. If it's too small, you won't be able to get it on at all, or it might tear. If it's too big, it won't stay in place. Most of our protective rubber end caps come in a range of sizes, so measure the diameter of the object you're covering carefully. You can use a caliper for a more precise measurement.
-
Stretch the Cap (if necessary): Some rubber caps are made of a more flexible material and might need a little stretching to fit over the end of the object. You can do this by gently pulling on the edges of the cap with your fingers. Be careful not to pull too hard, or you could damage the cap.
-
Slide the Cap On: Once you've prepared the surface and stretched the cap if needed, it's time to slide it onto the end of the rod or tube. Start by aligning the cap with the end of the object. Then, slowly push it on, using your fingers to guide it. You might need to apply a little pressure, especially if the fit is snug. If you're having trouble getting it on, you can try using a little bit of lubricant, like soapy water. Just make sure to wipe off any excess lubricant after you've installed the cap.
Installing Rubber Square Caps
Next up, let's look at Rubber Square Caps. These are often used to cover square-shaped objects, like the corners of furniture or the ends of square tubes.
-
Clean and Measure: Just like with the protective rubber end caps, clean the surface of the object you're covering and measure the dimensions. For square caps, you'll need to measure both the length and width of the square end.


-
Check the Fit: Square caps are designed to fit snugly over square objects. Make sure the cap you've chosen matches the size of your object. If it's a bit tight, you can try stretching it gently, but be careful not to distort the shape.
-
Position and Press: Place the rubber square cap over the square end of the object, aligning the corners. Then, press down firmly on all four sides to make sure the cap is fully seated. You might need to use a little force, especially if the cap is made of a thicker rubber.
Installing Rubber Bolt Caps
Finally, let's talk about Rubber Bolt Caps. These are used to cover the heads of bolts, providing protection and a more finished look.
-
Inspect the Bolt: First, check the bolt to make sure it's in good condition. There shouldn't be any sharp edges or burrs that could damage the rubber cap. If there are, you can use a file to smooth them out.
-
Select the Right Size: Measure the diameter of the bolt head. Our rubber bolt caps come in different sizes to fit various bolt heads. Make sure you choose the one that matches your bolt.
-
Push the Cap Onto the Bolt Head: Simply place the rubber bolt cap over the bolt head and push it down. You might need to apply a bit of pressure to get it to fit properly. Once it's on, give it a little tug to make sure it's secure.
Tips and Tricks
- Use Gloves: When installing rubber caps, it can be a good idea to wear gloves. This can protect your hands from any sharp edges on the objects you're working with, and it can also give you a better grip on the rubber caps.
- Be Patient: Installing rubber caps might take a little time, especially if you're dealing with a tight fit. Don't rush the process, or you could end up damaging the caps or not getting them installed correctly.
- Test the Fit: After you've installed a rubber cap, give it a little wiggle or tug to make sure it's secure. If it seems loose, you might need to try a different size or use a little adhesive to keep it in place.
Conclusion
So, there you have it! That's how you install rubber caps. Whether you're using Protective Rubber End Caps, Rubber Square Caps, or Rubber Bolt Caps, following these steps should make the process a breeze.
If you're in the market for high-quality rubber caps, we've got you covered. We offer a wide range of rubber caps in different sizes, shapes, and materials to meet your needs. Whether you're a DIY enthusiast, an industrial professional, or just looking to make some home improvements, our rubber caps are a great choice.
If you have any questions about our products or need help choosing the right rubber caps for your project, don't hesitate to reach out. We're here to assist you with your procurement needs and ensure you get the best rubber caps for your money. Let's start a conversation and see how we can work together!
References
- General knowledge about rubber cap installation and product properties from years of experience in the rubber cap supply industry.